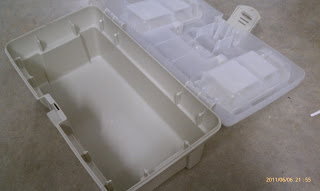
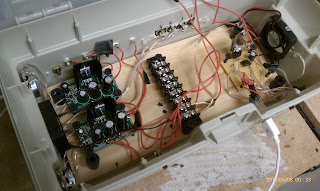
“the BarkBox 1.0”
We are coming up on one of our favorite volunteer activities of the whole year, the San Diego 100 Mile Endurance Run SD100. Our Aid Station is one of the most critical, fun, entertaining, busy, and everything else... but this leads into my latest project the BarkBox. One of my duties is the music and means of supplying said beats. I’ve been using a really old analog super low power old school boombox, I think the abuse it received last year was the final straw and it’s speakers and internal amp went South and not in a good way… but that’s ok because I think I’ve owned this thing for something like 20 years! Geez , I think I earned a new one.
Well for most folks (and me included at times) would just go start shopping to find a suitable portable stereo. Of the plethora of varieties and prices out there it would be fun shopping; however, based on my unexpected success and results of my previous project the “Planjo”… oh yeah, and my lack of funds, I decided why not see what I can do with what’s in the garage. Thus BarkBox was given life, it has a long way to go and I got some really fascinating ideas for version 2.0 but you’ll have to wait and hear about those once I start building (after the current project of the Bryan Saloon is done). BTW - Thank you to my very very patient wife who endured my few 2am working sessions.. including one of those where I was testing Volume and Gain on the individual Amps.
The name BarkBox is derived because this was built mainly for the use of our Sunrise Aid Station at the SD100. Our station is themed and aptly named “the Dog Pound” so what better compliment that then to build “the BarkBox”!
Goal: My aim on this project was initially just to build a speaker enclosure for two fairly decent 8ohm 5” DVC speakers I had sitting around (well, actually they are gathering dust waiting for me to finish yet a different project.. surprise surprise). Though since the AMP I was using previously (my store bought boombox over 20 years old) could not handle anything larger than small room listening I needed something that could broadcast and be heard over the mountains in a wide open space. The objective here was to see if I could replicate something as a prototype with minimal funding and be creative with what I already had available to me. It also had to be low power and run of readily available batteries (2.0 will hopefully be solar) and be able to charge whatever device the tunes are playing from.
Cost: about $30 (not counting whatever I already had laying around like speakers and some of the electronics). I actually spent a great deal more than that but I was also replenishing my electronics toolkit and plan to return any unused items.
Time to build: All together about 20 hours, after all I did have to go back and re-teach myself soldering by deconstructing an old VCR (YES, a VHS VCR…ever seen one of those kids). This had the added result of harvesting some ‘new’ LED’s, Capacitors, and some micro switches and buttons… COOL!
Result: AWESOME! Somewhat surprising to me was how well this worked once everything got packaged back together.
Stats:
- Two Amps, a Left and Right channel @ 7 Watts each
- Two speaker enclosures capable of running any format speaker wiring since they are Dual Coil Voice; I can run them as 4 or 8 Ohm, 65Watts output capable, and can be in a single or double stereo setup
- USB Charger (properly built circuit for you critiques out there, this is not a straight drop down from 9v to 5v regulator)
- Rugged enclosures and very discreet. I love that it looks like nothing but packs some great performance
- Can operate on 8v - 15v (9v battery or 12v setup like 8xAA which is what I use)
Other Notes: To save even more money, and since the store was not open at 1am durnig testing I fashioned my own heat sinks as amps and regulators tend to lose a lot of energy through heat. Yes, not the most efficient project but it works great, I LOVE how it looks, and I have some amazing ideas for version 2.0. Some of you may also note the kit boards on the amps. Let it be known I actually did build my own two Amps using the LM386 IC design, unfortunately those produced serious noise problems and static at anything over a Dishwasher volume level. Not satisfactory for my use so I opted for another IC designed for more power and just a better all around Op Amp. Only problem is that I could not find these IC's standalone and in my search came across a kit so admittedly I did buy the kit, funny fact is that the schematic was identical on the kit to the one on my breadboard save for some resistance and capacitance values.
We all love pics so here are a few of them and the rest of them will be in my Picasa library (links are on this page in the menu)


